What is a Power BI DateKey and why should I care?
One thing I learned the hard way was to always use a solid Power BI DateKey or date table in my Power BI models. Building your own DateKey is essential for good time intelligence as the inbuilt Power BI calendar doesn’t cover all the periods you’ll need including a very important one for us accountants… Financial Year!
There are a number of ways for you to create a DateKey in your Power BI model and there are some great guides out there (like Nate’s here), but I felt the need to put together a guide on how I create my date tables because there are some finance specific things a lot of guides miss (eg including financial quarters) and using M Code makes the process really efficient to set up.
Step 1
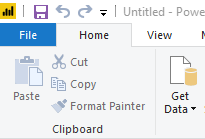
Open Power BI Desktop and click Edit Queries to open the Power Query Editor.
Step 2
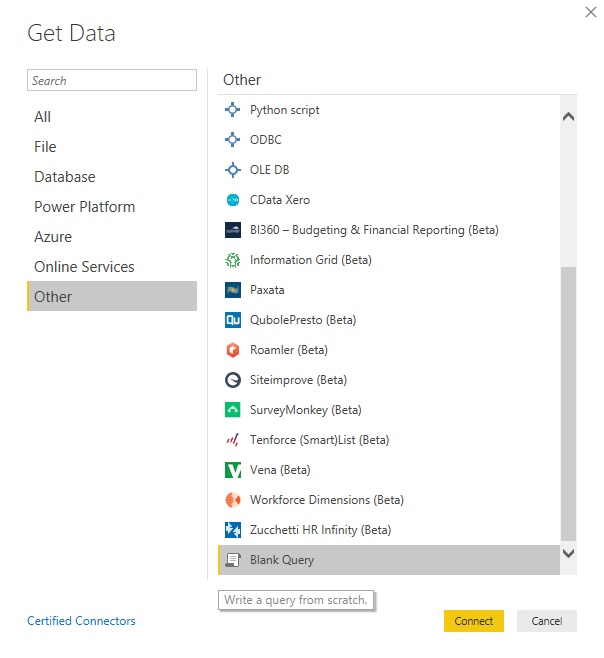
Click New Source and select “Blank Query” found under Other or simply search for it then click Connect.
Step 3
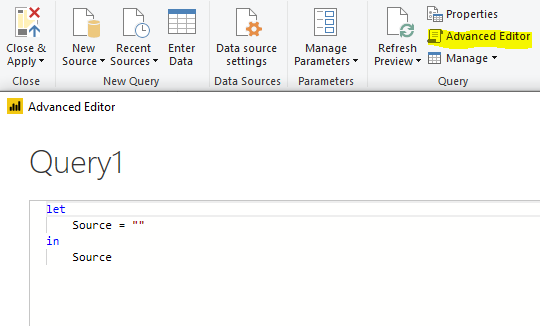
Along the top ribbon, click on Advanced Editor which will open up a box that lets you create a query based on M Code.
Step 4
Copy and paste the following M Code into the box overwriting any text that was already in there and click Done.
let
    Source = List.Dates(StartDate, Length, #duration(1, 0, 0, 0)),
    StartDate = #date(2015, 7, 1),
    TodayDate = DateTime.Date(DateTime.LocalNow()),
    Length = Duration.Days(TodayDate - StartDate)+1,
    #"Converted to Table" = Table.FromList(Source, Splitter.SplitByNothing(), null, null, ExtraValues.Error),
    #"Renamed Columns" = Table.RenameColumns(#"Converted to Table",{{"Column1", "Date"}}),
    #"Changed Type" = Table.TransformColumnTypes(#"Renamed Columns",{{"Date", type date}}),
    #"Added Index" = Table.AddIndexColumn(#"Changed Type", "Index", 1, 1),
    #"Inserted Day" = Table.AddColumn(#"Added Index", "Day Number", each Date.Day([Date]), Int64.Type),
    #"Inserted Week of Year" = Table.AddColumn(#"Inserted Day", "Week Number", each Date.WeekOfYear([Date]), Int64.Type),
    #"Inserted Month" = Table.AddColumn(#"Inserted Week of Year", "Month Number", each Date.Month([Date]), Int64.Type),
    #"Inserted Quarter" = Table.AddColumn(#"Inserted Month", "Quarter", each Date.QuarterOfYear([Date]), Int64.Type),
    #"Added Prefix" = Table.TransformColumns(#"Inserted Quarter", {{"Quarter", each "Q" & Text.From(_, "en-AU"), type text}}),
    #"Inserted Year" = Table.AddColumn(#"Added Prefix", "Year", each Date.Year([Date]), Int64.Type),
    #"Inserted Day Name" = Table.AddColumn(#"Inserted Year", "Day Name", each Date.DayOfWeekName([Date]), type text),
    #"Extracted First Characters" = Table.TransformColumns(#"Inserted Day Name", {{"Day Name", each Text.Start(_, 3), type text}}),
    #"Inserted Month Name" = Table.AddColumn(#"Extracted First Characters", "Month Name", each Date.MonthName([Date]), type text),
    #"Extracted First Characters1" = Table.TransformColumns(#"Inserted Month Name", {{"Month Name", each Text.Start(_, 3), type text}}),
    #"Inserted Days in Month" = Table.AddColumn(#"Extracted First Characters1", "Days in Month", each Date.DaysInMonth([Date]), Int64.Type),
    #"Inserted Day of Week" = Table.AddColumn(#"Inserted Days in Month", "Day of Week", each Date.DayOfWeek([Date])+1),
    #"Inserted Year1" = Table.AddColumn(#"Inserted Day of Week", "Financial Year", each Date.Year([Date]+#duration(184,0,0,0)), Int64.Type),
    #"Added Conditional Column" = Table.AddColumn(#"Inserted Year1", "Financial Month", each if ([Month Number]-6) <= 0 then [Month Number]+6 else [Month Number]-6),
    #"Added Conditional Column1" = Table.AddColumn(#"Added Conditional Column", "Financial Week", each if [Month Number] > 6 then [Week Number]-26 else [Week Number]+26),
    #"Duplicated Column" = Table.DuplicateColumn(#"Added Conditional Column1", "Month Name", "Financial Month Name"),
    #"Inserted Quarter1" = Table.AddColumn(#"Duplicated Column", "Quarter1", each Date.QuarterOfYear([Date]), Int64.Type),
    #"Added Conditional Column2" = Table.AddColumn(#"Inserted Quarter1", "Financial Quarter", each if [Quarter1] > 2 then [Quarter1] -2 else [Quarter1] +2),
    #"Added Prefix1" = Table.TransformColumns(#"Added Conditional Column2", {{"Financial Quarter", each "Q" & Text.From(_, "en-AU"), type text}}),
    #"Removed Columns" = Table.RemoveColumns(#"Added Prefix1",{"Quarter1"}),
    #"Added Custom" = Table.AddColumn(#"Removed Columns", "Year and Month", each (100*[Year])+[Month Number])
in
    #"Added Custom"
Step 5
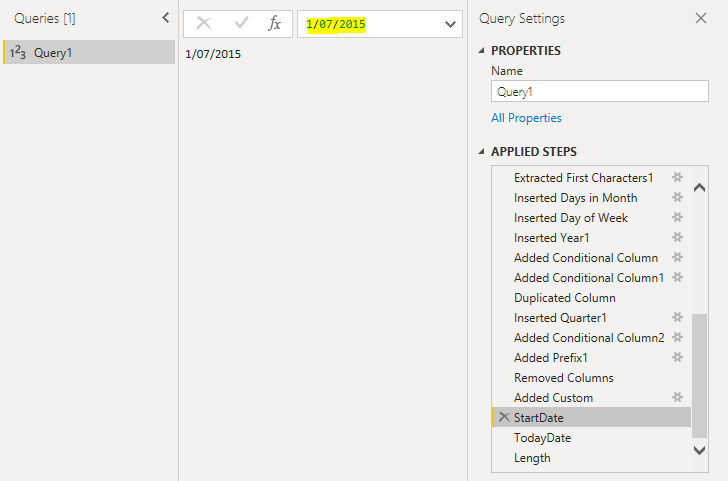
There are two steps in the Query that you’ll need to edit and they are “StartDate” and “TodayDate”.
“StartDate” needs to be set to the earliest date you want the DateKey to run from, in my example case it’s 01/07/2015. You simply type over the top of it with a date and the query does the rest.
My Power BI DateKey is designed to end at “TodayDate” so the DateKey constantly grows over time. In the event you have some future dated data in your model, you can simply type over the code and set it to whatever date you like (eg 30/06/2035), then the query does the rest.
One other thing to be aware of is that my DateKey runs on an Australian Financial Year (July to June), if you are running a different FInancial Year then you need to edit some code, in particular this section:
    #"Inserted Year1" = Table.AddColumn(#"Inserted Day of Week", "Financial Year", each Date.Year([Date]+#duration(184,0,0,0)), Int64.Type),
    #"Added Conditional Column" = Table.AddColumn(#"Inserted Year1", "Financial Month", each if ([Month Number]-6) <= 0 then [Month Number]+6 else [Month Number]-6),
    #"Added Conditional Column1" = Table.AddColumn(#"Added Conditional Column", "Financial Week", each if [Month Number] > 6 then [Week Number]-26 else [Week Number]+26),
Changing the month is quite simple, simply change the number “6” to suite your financial year based on how months away from January it starts, for example New Zealand’s Financial Year runs April to March, so you would change the “6” to a “3”.
Then to fix the financial year you need to change the duration value “184” to suite. The duration needs to be set to the number of days between 31 December and your year end date. For example New Zealand’s Financial Year ends 31 March, so you would start with 31 December (being day 365), then subtract 31 March (being day 91) leaving you with 275.
Step 6
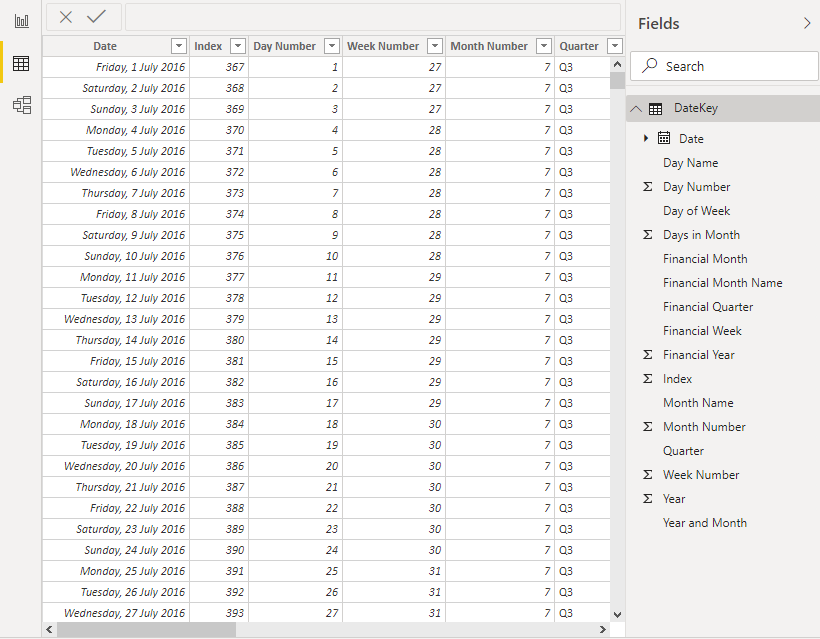
Rename your query something like “DateKey” then simply hit Close & Apply to enjoy your new Power BI date table! The key things that make this date table useful for me are:
- Week numbers which enable you to calculate things like weekly averages.
- Quarters which are essential from a finance and accounting perspective.
- Financial periods which again, are very important for us finance professionals.
- Index + Year and Month columns which might seem strange at first, but these are essential for sorting things in the correct chronological order using advanced time intelligence.
All done, enjoy your DateKey! For more Power BI tips & tricks sign up to our newsletter!